When automation scripts are executed, firefox browser is launched with out add-ons in it.
Adding the firebug add-on to the the FirefoxDriver instance is possible with the below approach.
1. Download the "firebug-<<version>>.xpi" file in Internet Explorer browser.
https://addons.mozilla.org/en-US/firefox/addon/firebug/

Note: if the url "https://addons.mozilla.org/en-US/firefox/addon/firebug/" is accessed in firefox browser, add-on will be directly installed in to firefox browser.
2. Click on "Download" button.


import java.io.IOException;
import org.openqa.selenium.By;
import org.openqa.selenium.WebDriver;
import org.openqa.selenium.WebElement;
import org.openqa.selenium.firefox.FirefoxDriver;
import org.openqa.selenium.firefox.FirefoxProfile;
public class FF {
public static void main(String[] args) throws IOException {
//Path of the firebug addon(i.e. firebug-<<version>>.xpi file)
File addonpath = new File(System.getProperty("user.dir")+"\\other\\firebug-2.0.7-fx.xpi");
FirefoxProfile firefoxprofile = new FirefoxProfile();
//This will add Firebug add-on to the new profile created.
firefoxprofile.addExtension(addonpath);
//Pass the Firefox profile to the FirefoxDriver instance.
WebDriver driver = new FirefoxDriver(firefoxprofile);
driver.get("http://www.google.com");
WebElement element = driver.findElement(By.name("q"));
element.sendKeys("Webdriver");
}
}
 Note: Above program is not integrated with TestNG/Junit, execution is done from the main method.
Executing the program in Debug mode:

Script execution is paused at break point.

Firebug add-on is added to the firefox browser launched by webdriver api and is visible on the top right corner of the browser.
 By default there will be no add-ons present in the firefox browser launched by using webdriver api.
This add-on(i.e. firebug addon) is added only if the firebug extension is added to the FirefoxDriver instance. ex: WebDriver driver = new FirefoxDriver(firefoxprofile);
Press keyboard 'F6'


Adding the firebug add-on to the the FirefoxDriver instance is possible with the below approach.
1. Download the "firebug-<<version>>.xpi" file in Internet Explorer browser.
https://addons.mozilla.org/en-US/firefox/addon/firebug/
Note: if the url "https://addons.mozilla.org/en-US/firefox/addon/firebug/" is accessed in firefox browser, add-on will be directly installed in to firefox browser.
2. Click on "Download" button.
3. Click on "download anyway" link.
4. Click on "Save"
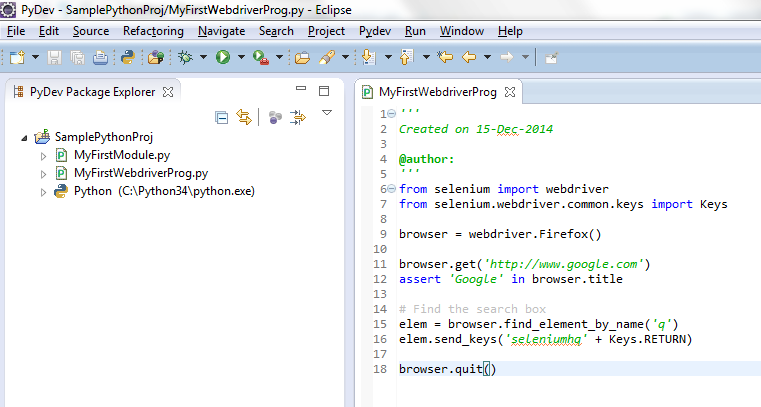
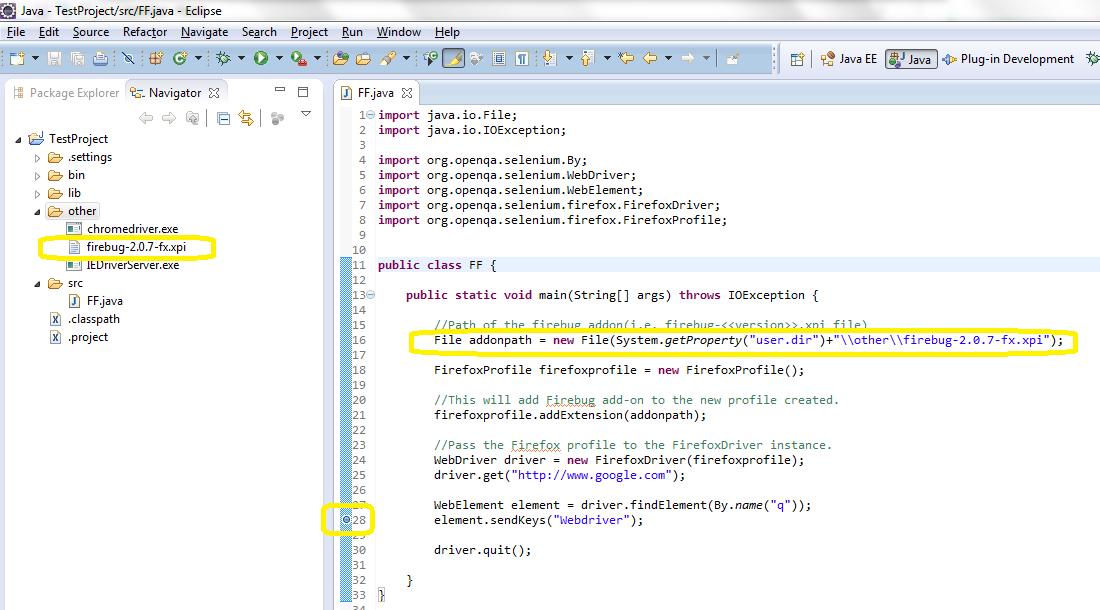
Program:
import java.io.File;import java.io.IOException;
import org.openqa.selenium.By;
import org.openqa.selenium.WebDriver;
import org.openqa.selenium.WebElement;
import org.openqa.selenium.firefox.FirefoxDriver;
import org.openqa.selenium.firefox.FirefoxProfile;
public class FF {
public static void main(String[] args) throws IOException {
//Path of the firebug addon(i.e. firebug-<<version>>.xpi file)
File addonpath = new File(System.getProperty("user.dir")+"\\other\\firebug-2.0.7-fx.xpi");
FirefoxProfile firefoxprofile = new FirefoxProfile();
//This will add Firebug add-on to the new profile created.
firefoxprofile.addExtension(addonpath);
//Pass the Firefox profile to the FirefoxDriver instance.
WebDriver driver = new FirefoxDriver(firefoxprofile);
driver.get("http://www.google.com");
WebElement element = driver.findElement(By.name("q"));
element.sendKeys("Webdriver");
}
}
Executing the program in Debug mode:
Script execution is paused at break point.
Firebug add-on is added to the firefox browser launched by webdriver api and is visible on the top right corner of the browser.
This add-on(i.e. firebug addon) is added only if the firebug extension is added to the FirefoxDriver instance. ex: WebDriver driver = new FirefoxDriver(firefoxprofile);
Press keyboard 'F6'
Press keyboard 'F8'