Prerequisite:
Download and install latest version of Xamarin Studio from http://www.monodevelop.com/download/
Click 'Install from file' button.
Download and install latest version of Xamarin Studio from http://www.monodevelop.com/download/
Download SpecFlow addin for Xamarin Studio 6 from
https://github.com/mikeyjones/SpecFlow
https://github.com/mikeyjones/SpecFlow/releases/download/v1.9.2/TechTalk.SpecFlow.TechTalk.SpecFlow_1.9.1.0.mpack
https://github.com/mikeyjones/SpecFlow/releases/download/v1.9.2/TechTalk.SpecFlow.TechTalk.SpecFlow_1.9.1.0.mpack
Xamarin Studio addin for SpecFlow is downloaded.
Open the Xamarin Studio and
select 'Tools' -> 'Add-ins'
Click 'Install from file' button.
Open the location of file downloaded(i.e. specflow addin file 'TechTalk.SpecFlow.TechTalk.SpecFlow_1.9.1.0.mpack')
Click 'Open' button.
Click 'Install' button.
Open the Xamarin Studio, Create the new solution
New Project dialog is opened,
select 'Other > Miscellaneous > General > SpecFlow NUnit Library Project' to select SpecFlow template for project.
select 'Other > Miscellaneous > General > SpecFlow NUnit Library Project' to select SpecFlow template for project.
Enter project name and click 'Create' button.
ex- project name: FirstSpecFlowTest
ex- project name: FirstSpecFlowTest
Feature file is created(i.e. default feature file is created)
Select 'View' -> 'Design' to view solution explorer.
Add package 'Xamarin.UITest' from Nuget package to the project.
Search for 'Xamarin.UITest', select checkbox for 'Xamarin.UITest' and click 'Add Package'.
'Xamarin.UITest' is installed and added to project package.
Select 'View' -> 'Test' to open 'Unit Test Window'
If 'Unit Test' pad is not opened, then select 'View' -> 'Pads' -> 'Unit Tests' to view 'Unit Test' pad.
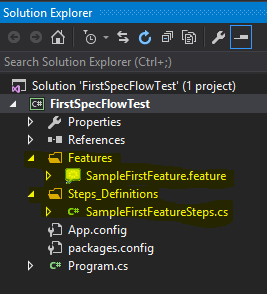
Two files are present(i.e. created)
Test.feature -> Feature file
TestSteps.cs -> Step definitions file
Build Project
Run Test in 'Unit Test'
Test Result
Add Console.Writeline(....) in step definition methods.
Note: Console.Writeline(...) is added for only test demo purpose, in real time there will be some logic/implementation is added instead of Console.Writeline(...) in step definition methods.
Build the project and run the test again
Open the 'Application Output', by selecting 'View' -> 'Pads' -> 'Application Output'
View the output of Console.Writeline(....) in 'Application Output'
References:


