Thursday, 14 May 2015

Appium overview, device versions and api levels

Watch the below video demo for Appium overview, device versions and api levels.

Video Covers below topics.
Previous demo summary:
- Appium Installation
   http://automation-home.blogspot.in/2015/05/appium-installation.html   
   http://appium.io/slate/en/master/?java#setup

Why Appium?
    http://appium.io/getting-started.html

Does Appium works for all android devices ?
   http://appium.io/slate/en/v1.0.0/?ruby#running-your-test-app-with-appium-%28android-devices-%3C-4.2,-and-hybrid-tests%29

Android versions and API levels.
    http://www.android.com/history/
    http://en.wikipedia.org/wiki/Android_version_history

Watch Demo

Wednesday, 13 May 2015

Appium - Installation

Appium is an opensource test automation tool to work with native, hybrid and mobile web apps.

Appium Softwares: 
Below are the bunch of software's and configuration's need to be done to work with APPIUM automation tool.

1. JDK 

2. Download Eclipse IDE


4. Install Android SDK

5. Set the Environment variable for Android SDK.
6. Install Appium Server for windows os.

7. Download the Appium java client jar file.

8. Download the Selenium Webdriver java client jar file.

9. Install Phone Drivers

10. Enable Developer options in the mobile device.
11. Enable USB Debugging in Mobile Device.
    http://automation-home.blogspot.com/2015/12/enable-developer-options.html

Watch Demo

Saturday, 9 May 2015

WebdriverJS - JavaScript bindings for WebDriver

WebdriverJS is javascript bindings for webdriver, using WebdriverJS you can write the automation script in javascript and execute the Webdriver Javascript.

Prerequisite:
1. Node.js is alreaddy installed click 'http://automation-home.blogspot.in/2015/05/installing-nodejs-and-npm-on-windows.html' for node.js installation process.
2. 'Chromedriver.exe' can be downloaded from 'https://sites.google.com/a/chromium.org/chromedriver/downloads'
3. Set the 'Chromedriver.exe' in the PATH variable,
click the url 'http://www.computerhope.com/issues/ch000549.htm' for setting the PATH variable.

Steps for Executing the script developed using WebdriverJS:

Open the url 'https://code.google.com/p/selenium/wiki/WebDriverJs'

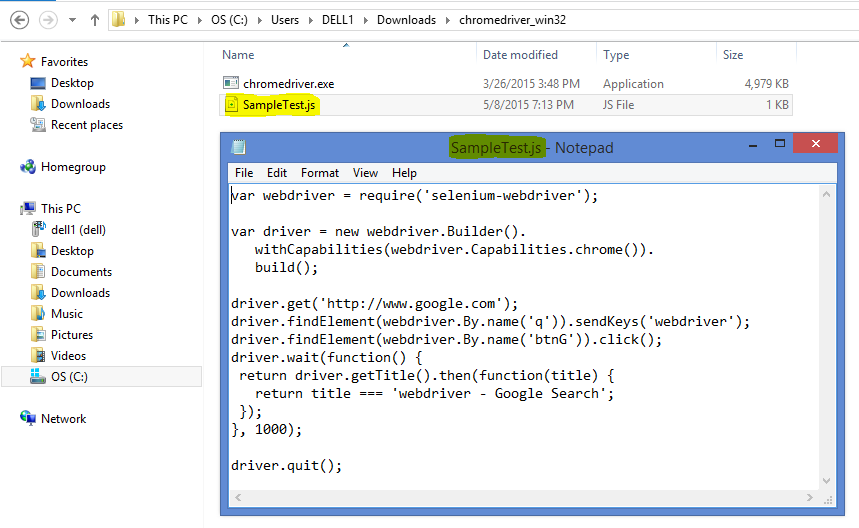
Save the copied javascript as 'SampleTest.js'.

Open the command prompt, navigate to the location where 'SampleTest.js' is present.
Run the command 'npm install selenium-webdriver' in the command prompt.

Run the command 'node SampleTest.js' in the command prompt.

Javascript 'SampleTest.js' is executed.

Watch Demo
Note:
Above post is older.
Webdriverjs is now deprecated,
Project is now called WebdriverIO(http://webdriver.io/). 

Monday, 4 May 2015

Installing Node.js and NPM on Windows

1. Download Node.js installer from https://nodejs.org/download


2. Run the installer (i.e. msi file )


Once installation is completed, restart your computer.
 
After your computer is restarted, check the Node.js and NPM versions by executing the below simple commands on Windows command prompt.

Test Node.js Version:
Type 'node -v' in command prompt and press enter key.


Test NPM Version:
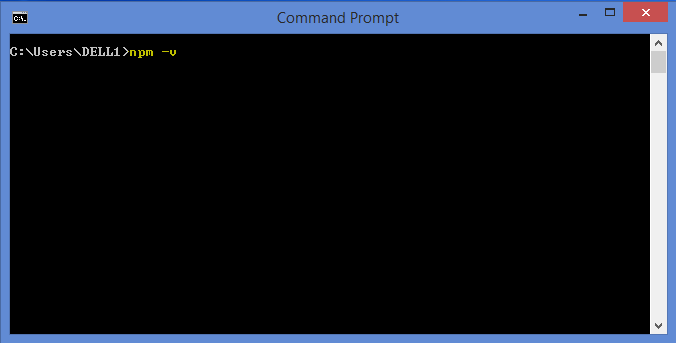
Type 'npm -v' in command prompt and press enter key.


Print 'Hello world' in console.


Prerequisite:
Node.js and NPM is installed.

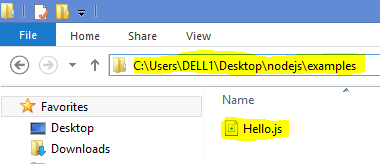
Add 'console.log('Hello world');' and save the file as 'Hello.js'


To run 'Hello.js', open the command prompt and navigate to folder location of 'Hello.js'.

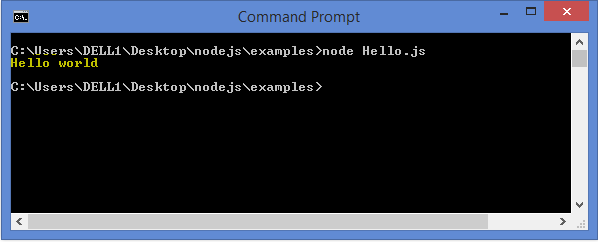
In command prompt type 'node Hello.js' and press enter key.

Saturday, 2 May 2015

AutomationHomeMobile App for Mobile.

'Automation-Home blog' Mobile App view.


Link to download & install the mobile app.
http://app.appsgeyser.com/AutomationHomeMobile

Download and Install the 'AutomationHomeMobile' App to view the 'Automation-Home' blog updates. 

Friday, 1 May 2015

Javascript - Javascript reads JSON data and display in the HTML.


JSON data is displayed in the HTML:

Javascript reads the JSON data:


JSON File: 'Books.json'
{
    "books": [
        {
            "header_language": "Programming Language",
            "header_book_name": "Book Name",
            "header_seller": "Seller"
        },
        {
            "language": "Java",
            "book_name": "Java, A Beginner's Guide, 5th Edition",
            "seller": "Amazon.in"
        },
        {
           "language": "C#",
            "book_name": "Microsoft Visual C# 2013",
            "seller": "flipkart.com"
        }
    ]
}

Javascript File: 'Books.js'
   $(function() {
   $.getJSON('Books.json', function(data) {
       $.each(data.books, function(i, b) {
          if(b.header_language!=undefined && b.header_book_name!=undefined && b.header_seller!=undefined){
          var thlRow =     "<th>" + b.header_language + "</th>" +
                        "<th>" + b.header_book_name + "</th>" +
                        "<th>" + b.header_seller + "</th>" 
                       
           $(thlRow).appendTo("#bookdata thead");             
          }

       if(b.header_language==undefined && b.header_book_name==undefined && b.header_seller==undefined){      
       var tblRow =     "<tr>" +
                            "<td>" + b.language + "</td>" +
                            "<td>" + b.book_name + "</td>" +
                            "<td>" + b.seller + "</td>" +
                        "</tr>"
           $(tblRow).appendTo("#bookdata tbody");
       }
     });
   });
});

HTML file: 'TestJson.html'
<html>
<head>
<script type="text/javascript" src="http://ajax.googleapis.com/ajax/libs/jquery/1.6.2/jquery.min.js"> </script>
<script type="text/javascript" src="Books.js"></script>
</head>

<body>
   <table id= "bookdata" border="2">
        <thead>
        </thead>
       
        <tbody>
        </tbody>
   </table>
</body>
</html>


Open the 'TestJson.html' file in Firefox browser:
 

Open the 'TestJson.html' file in Chrome browser:
 
JSON data is not displayed in the HTML file due to the Security setting of the chrome browser.
Chrome browser doesn't allow to read the data from files present in the system.

Check for the '--disable-web-security' of the chrome browser.
http://peter.sh/experiments/chromium-command-line-switches/

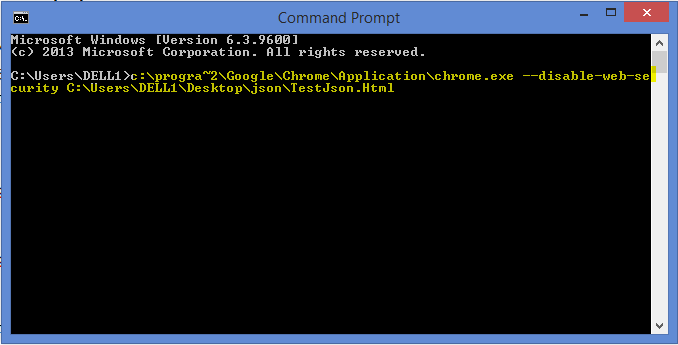
Open the command prompt.

Open the chrome browser with '--disable-web-security' parameter.
c:\progra~2\Google\Chrome\Application\chrome.exe --disable-web-security C:\Users\DELL1\Desktop\json\TestJson.Html 


Environment used  for executing the above JS, JSON, HTML: 
Operating System: Windows 8
Browser:
   - Firefox '33' version,
   - Google Chrome browser '42.0.2311.135' version


Above  .html, .js and .json files are re-written by making few minor changes and presented below.


JSON File: 'Books.json
 [
    {
        "header_language": "Programming Language",
        "header_book_name": "Book Name",
        "header_seller": "Seller"
    },
    {
        "language": "Java",
        "book_name": "Java, A Beginner's Guide, 5th Edition",
        "seller": "Amazon.in"
    },
    {
       "language": "C#",
        "book_name": "Microsoft Visual C# 2013",
        "seller": "flipkart.com"
    }
]

Javascript File: 'Books.js'
var jsonFile = 'Books.json';
  $(function() {
   $.getJSON(jsonFile, function(data) {
       $.each(data, function(i, b) {
          if(b.header_language!=undefined && b.header_book_name!=undefined && b.header_seller!=undefined){
          var thlRow =     "<th>" + b.header_language + "</th>" +
                        "<th>" + b.header_book_name + "</th>" +
                        "<th>" + b.header_seller + "</th>" 
                       
           $(thlRow).appendTo("#bookdata thead");             
          }

       if(b.header_language==undefined && b.header_book_name==undefined && b.header_seller==undefined){      
       var tblRow =     "<tr>" +
                            "<td>" + b.language + "</td>" +
                            "<td>" + b.book_name + "</td>" +
                            "<td>" + b.seller + "</td>" +
                        "</tr>"
           $(tblRow).appendTo("#bookdata tbody");
       }
     });
   });
});

HTML file: 'TestJson.html'
<html>
<head>
<script type="text/javascript" src="http://ajax.googleapis.com/ajax/libs/jquery/1.6.2/jquery.min.js"> </script>
<script type="text/javascript" src="Books.js"></script>
</head>

<body>
   <table id= "bookdata" border="2">
        <thead>
        </thead>
       
        <tbody>
        </tbody>
   </table>
</body>
</html> 

Wednesday, 29 April 2015

'Visual Studio Community 2013' Installation.

Visual Studio Community is a free for developing the applications.
Visual Studio Community can be used in a classroom learning environment, academic research or for contributing to open source projects.

For more information on 'Visual Studio Community 2013' visit the below links.
https://www.visualstudio.com/en-us/products/visual-studio-express-vs.aspx
https://www.visualstudio.com/products/visual-studio-community-vs

System Requirements:

1. Download the 'Visual Studio Community 2013' from https://www.visualstudio.com/en-us/news/vs2013-community-vs.aspx
Click the link 'Download Visual Studio Community 2013'.

2. Click on 'Save File' button.

3. 'vs_community.exe' is downloaded in to the download folder of the system.

4. Click on 'vs_community.exe' to install 'Visual Studio Community 2013' edition.

5. Accept the 'License Terms' and click on 'Next' button.

 6. Click on 'INSTALL' button.

Now just sit down and relax while the installation is in process.

7. Click 'LAUNCH' to launch 'Visual Studio Community 2013' for the first time.


8. Choose color theme and click 'Start Visual Studio' button.


9. 'Visual Studio' IDE is launched.